Run CFD using Automated Meshing and Web UI
Contents
1.3. Run CFD using Automated Meshing and Web UI#
In this page, we show you how to run a simulation of the ONERA M6 Wing that is built in ESP using the Web UI. The geometry model is built in Engineering Sketch Pad (ESP). More information about ESP installation is available here. To build the geometry through ESP, we use a series of statements and commands in a scripted fashion. This gives us the ability to rebuild and modify the model most efficiently. All ESP statements and commands are held in a *.csm file. ESP uses the OpenCSM (Open-source Constructive Solid Modeling) system which is a feature-based, associative, parametric solid modeler. The input to OpenCSM is an ASCII, human-readable *.csm file that is used to describe the model through a series of design parameters and a build prescription.
This quick start will guide you through the following steps:
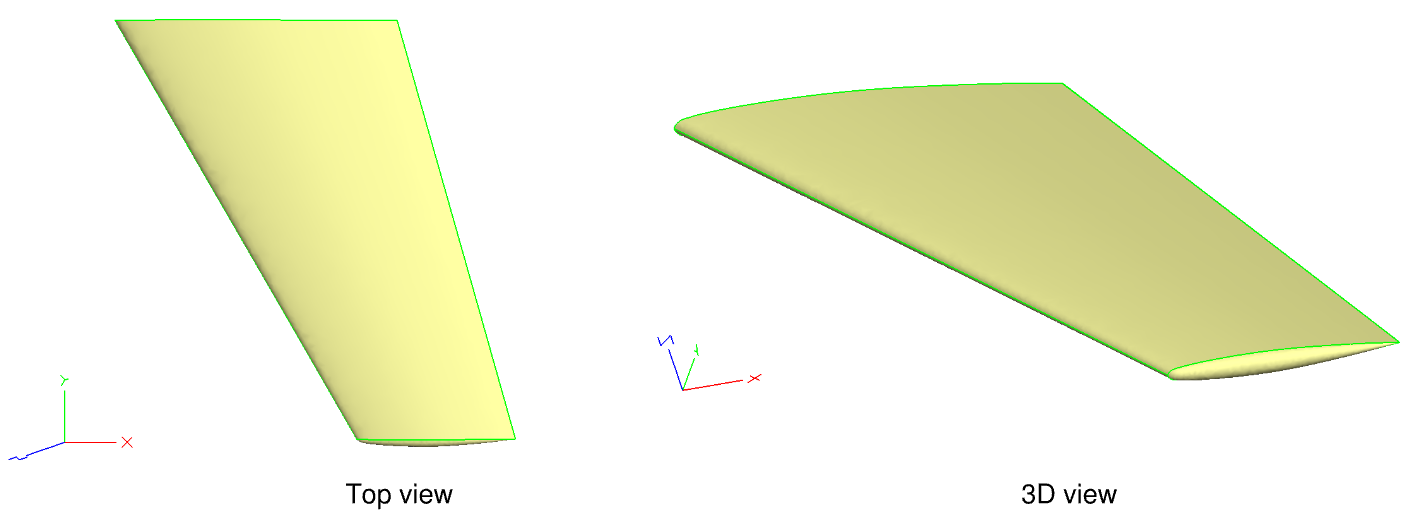
Fig. 1.3.1 ONERA M6 Wing generated in ESP#
Flow conditions:
Reynolds: 14.6e+6
Mach: 0.84
AoA: 3.06°
1.3.1. Pre-processing:#
Begin by uploading a *.csm file through the Web UI, simply sign in, and visit https://client.flexcompute.com/app/surfacemeshes.
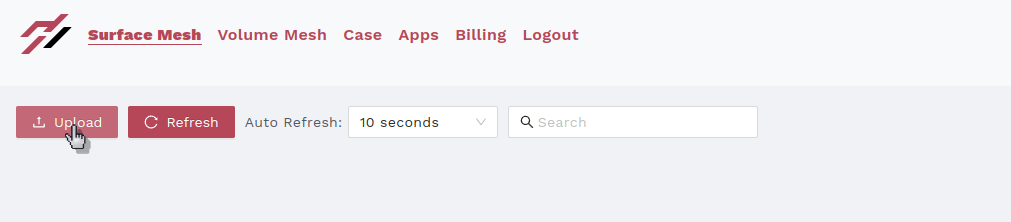
To upload a geometry model built in CSM format, click on the Surface Mesh tab, then on the Upload icon as displayed below:
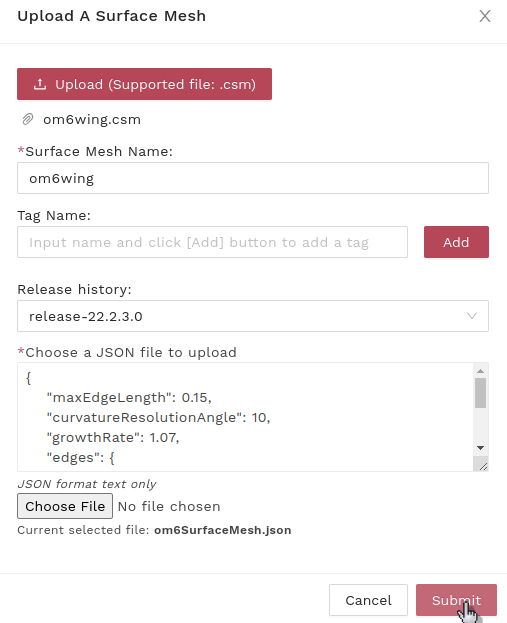
This will open an upload panel. In this panel, select the CSM file from your local computer. The ONERA M6 Wing ESP Model used in this quick start tutorial can be downloaded here: om6wing.csm.
Provide a name to the surface mesh in the Surface Mesh Name section. In Release history, select the solver version. We recommend using the latest released solver version (default if left blank).
Then click Choose file to upload the JSON file for surface mesh generation. For this case, an example surface mesh parameters JSON file is om6SurfaceMesh.json. Finally, select Submit.
If desired, you can monitor the processing status of the submitted surface mesh. When it is fully processed, we can continue to generate the volume mesh. Under the action column, select New Volume Mesh as shown below:

Note
Please note that status uploaded does not mean processed. First our servers receive the necessary files and then start processing them. Once they are done processing the surface mesh is ready for use.
This will open the volume mesh panel as shown below. In the panel, you can give a name to the volume mesh in Volume Mesh Name section and select the solver version in Release History. In the JSON Config section, when you hold the mouse at the right bottom corner, you can see an option to select and upload a volume mesh parameters JSON file.
Example volume mesh parameters are available for download in om6VolumeMesh.json. Select the volume mesh JSON file from your local computer and click on Submit.

You can then monitor the processing status of the submitted volume mesh. Once processed, we can submit a CFD case.
1.3.2. Processing:#
As shown below, select New Case under the Actions.

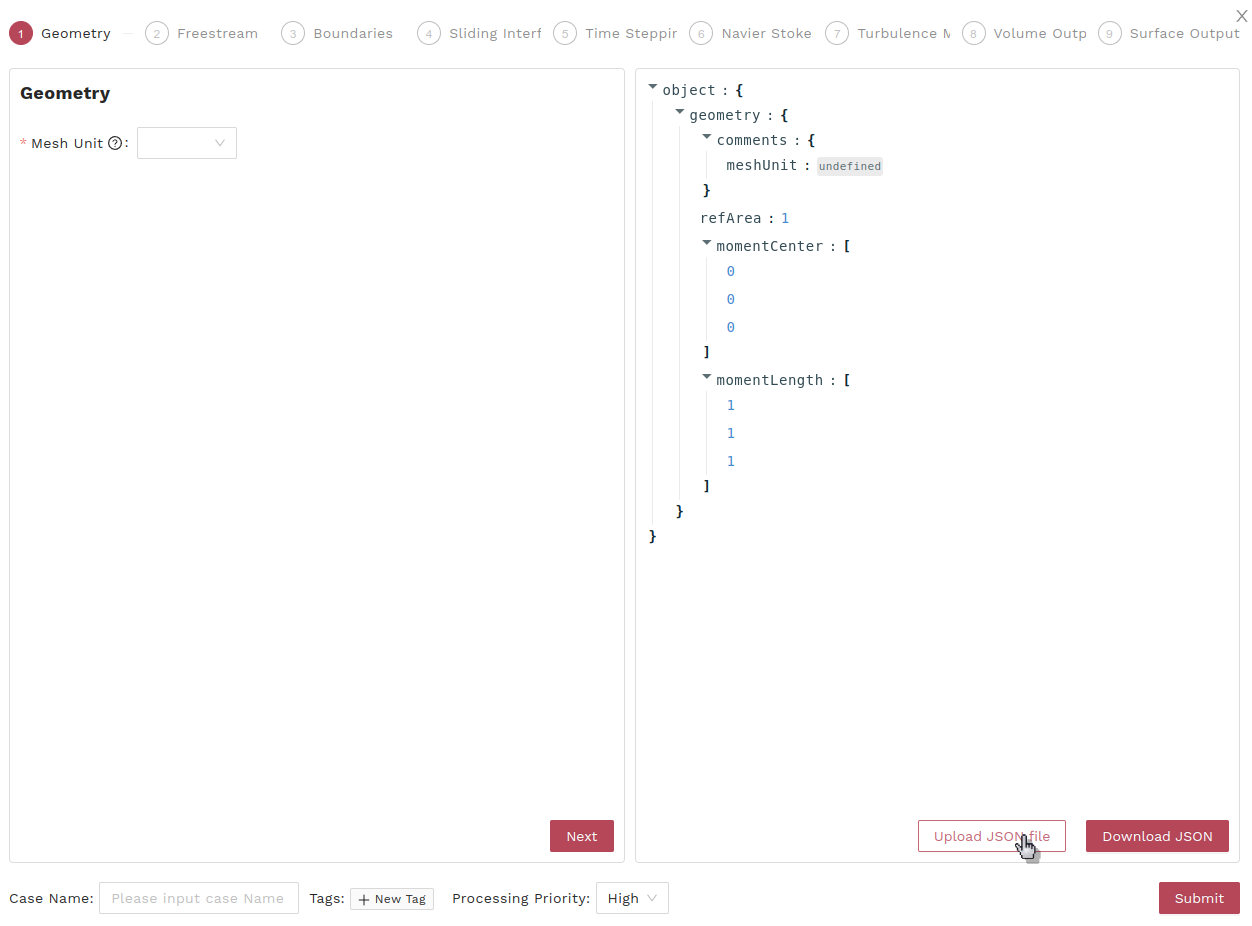
This will open the case panel shown below. Select Upload JSON file to upload a case configuration JSON file from your local computer. An example case setup JSON file with parameters specified for the ONERA M6 Wing CFD simulation is available in om6Case.json.
After selecting the case JSON file, the case upload panel shown below will open.
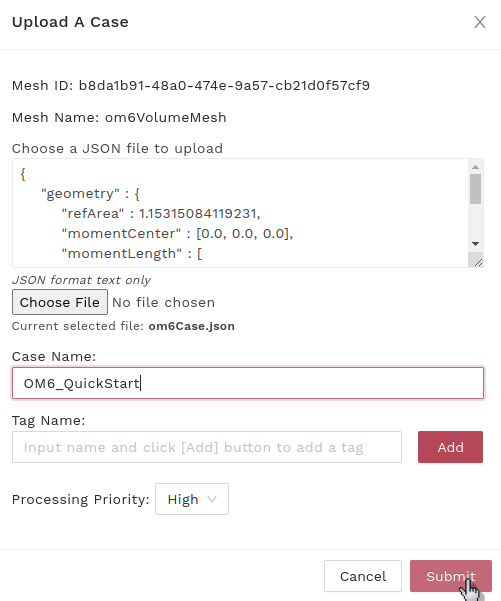
In this panel, you can give your simulation a name under Case Name. Finally, press Submit to launch the CFD simulation.
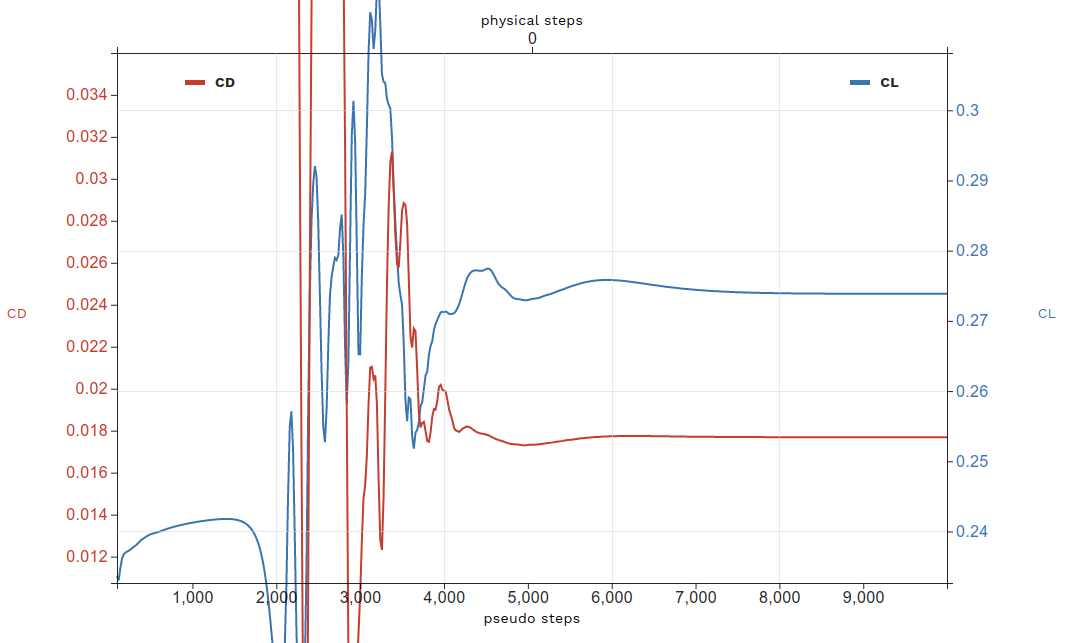
The new case status will present in the Case tab. When it is running, click on the case name to monitor convergence of the simulation in the Convergence and Forces panels as shown below.

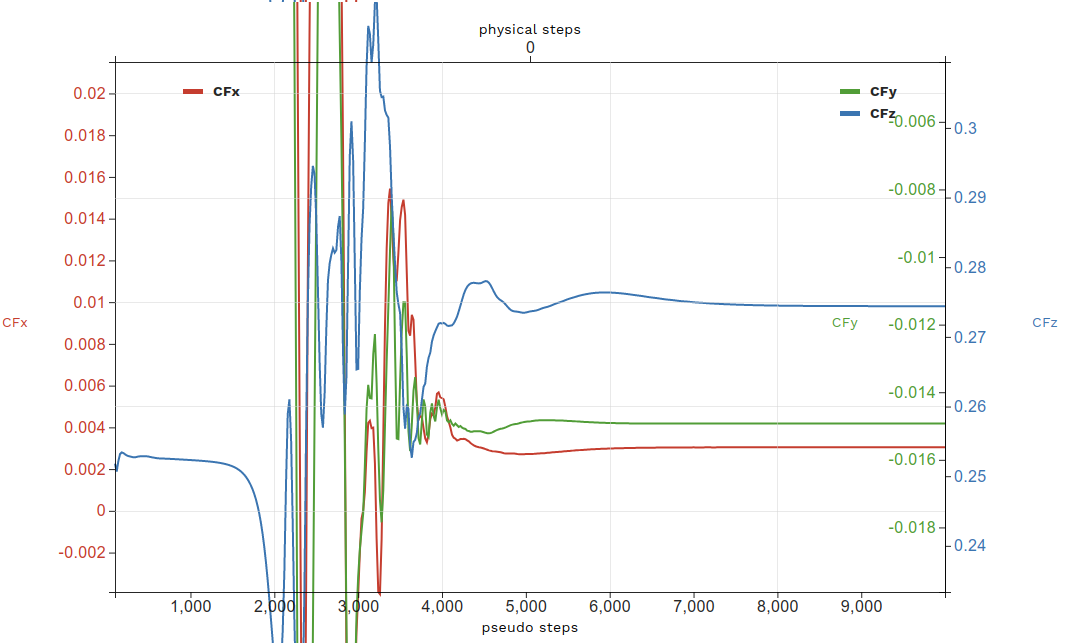
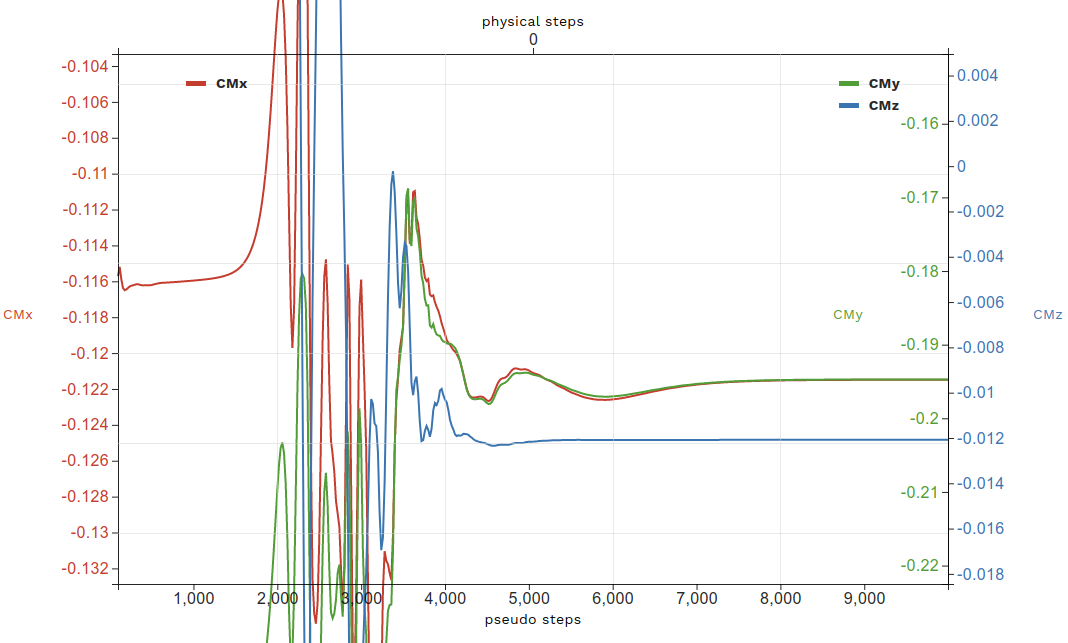
Force convergence histories are shown below for this example ONERA M6 Wing:
1.3.3. Post-processing:#
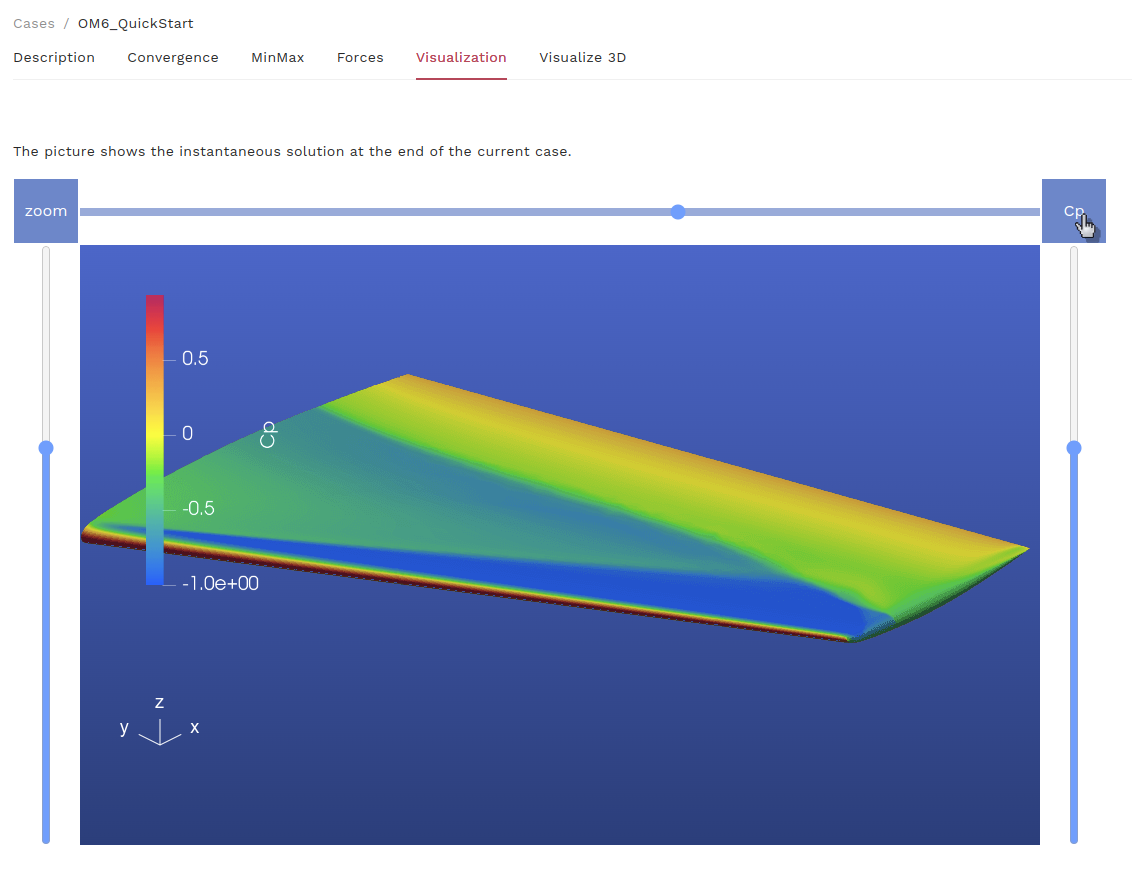
When the simulation status is completed, you can visualize the simulation results with contour plots under the Visualization tab as shown below.
If desired, you can download surface and volume results by selecting Download as shown below.

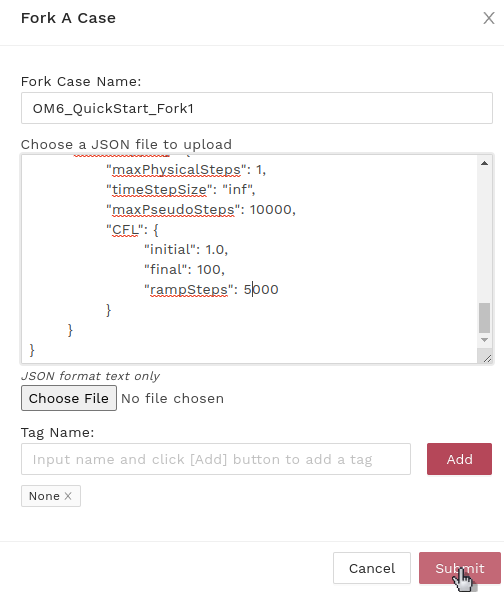
You can also continue the simulation by forking a case. In the fork panel, you are able to modify the case JSON file.
This is useful for continuing a case to achieve more convergence, or if you want to modify a run parameter
(e.g., AoA, AoS, Mach, etc.) to create a new solution at a different condition, but starting from an existing case. This is particularly useful for speeding up convergence if the changes from case to case are small.

A simulation can be archived to reduce storage cost. More information about data storage can be found in FAQ: How can I archive my case?

A simulation can be deleted as shown below. Once a case deleted, it cannot be recovered.
