General Workflow in Flow360 GUI#
This document outlines the systematic approach to setting up and running CFD simulations using the Flow360 graphical user interface.
Workbench view#
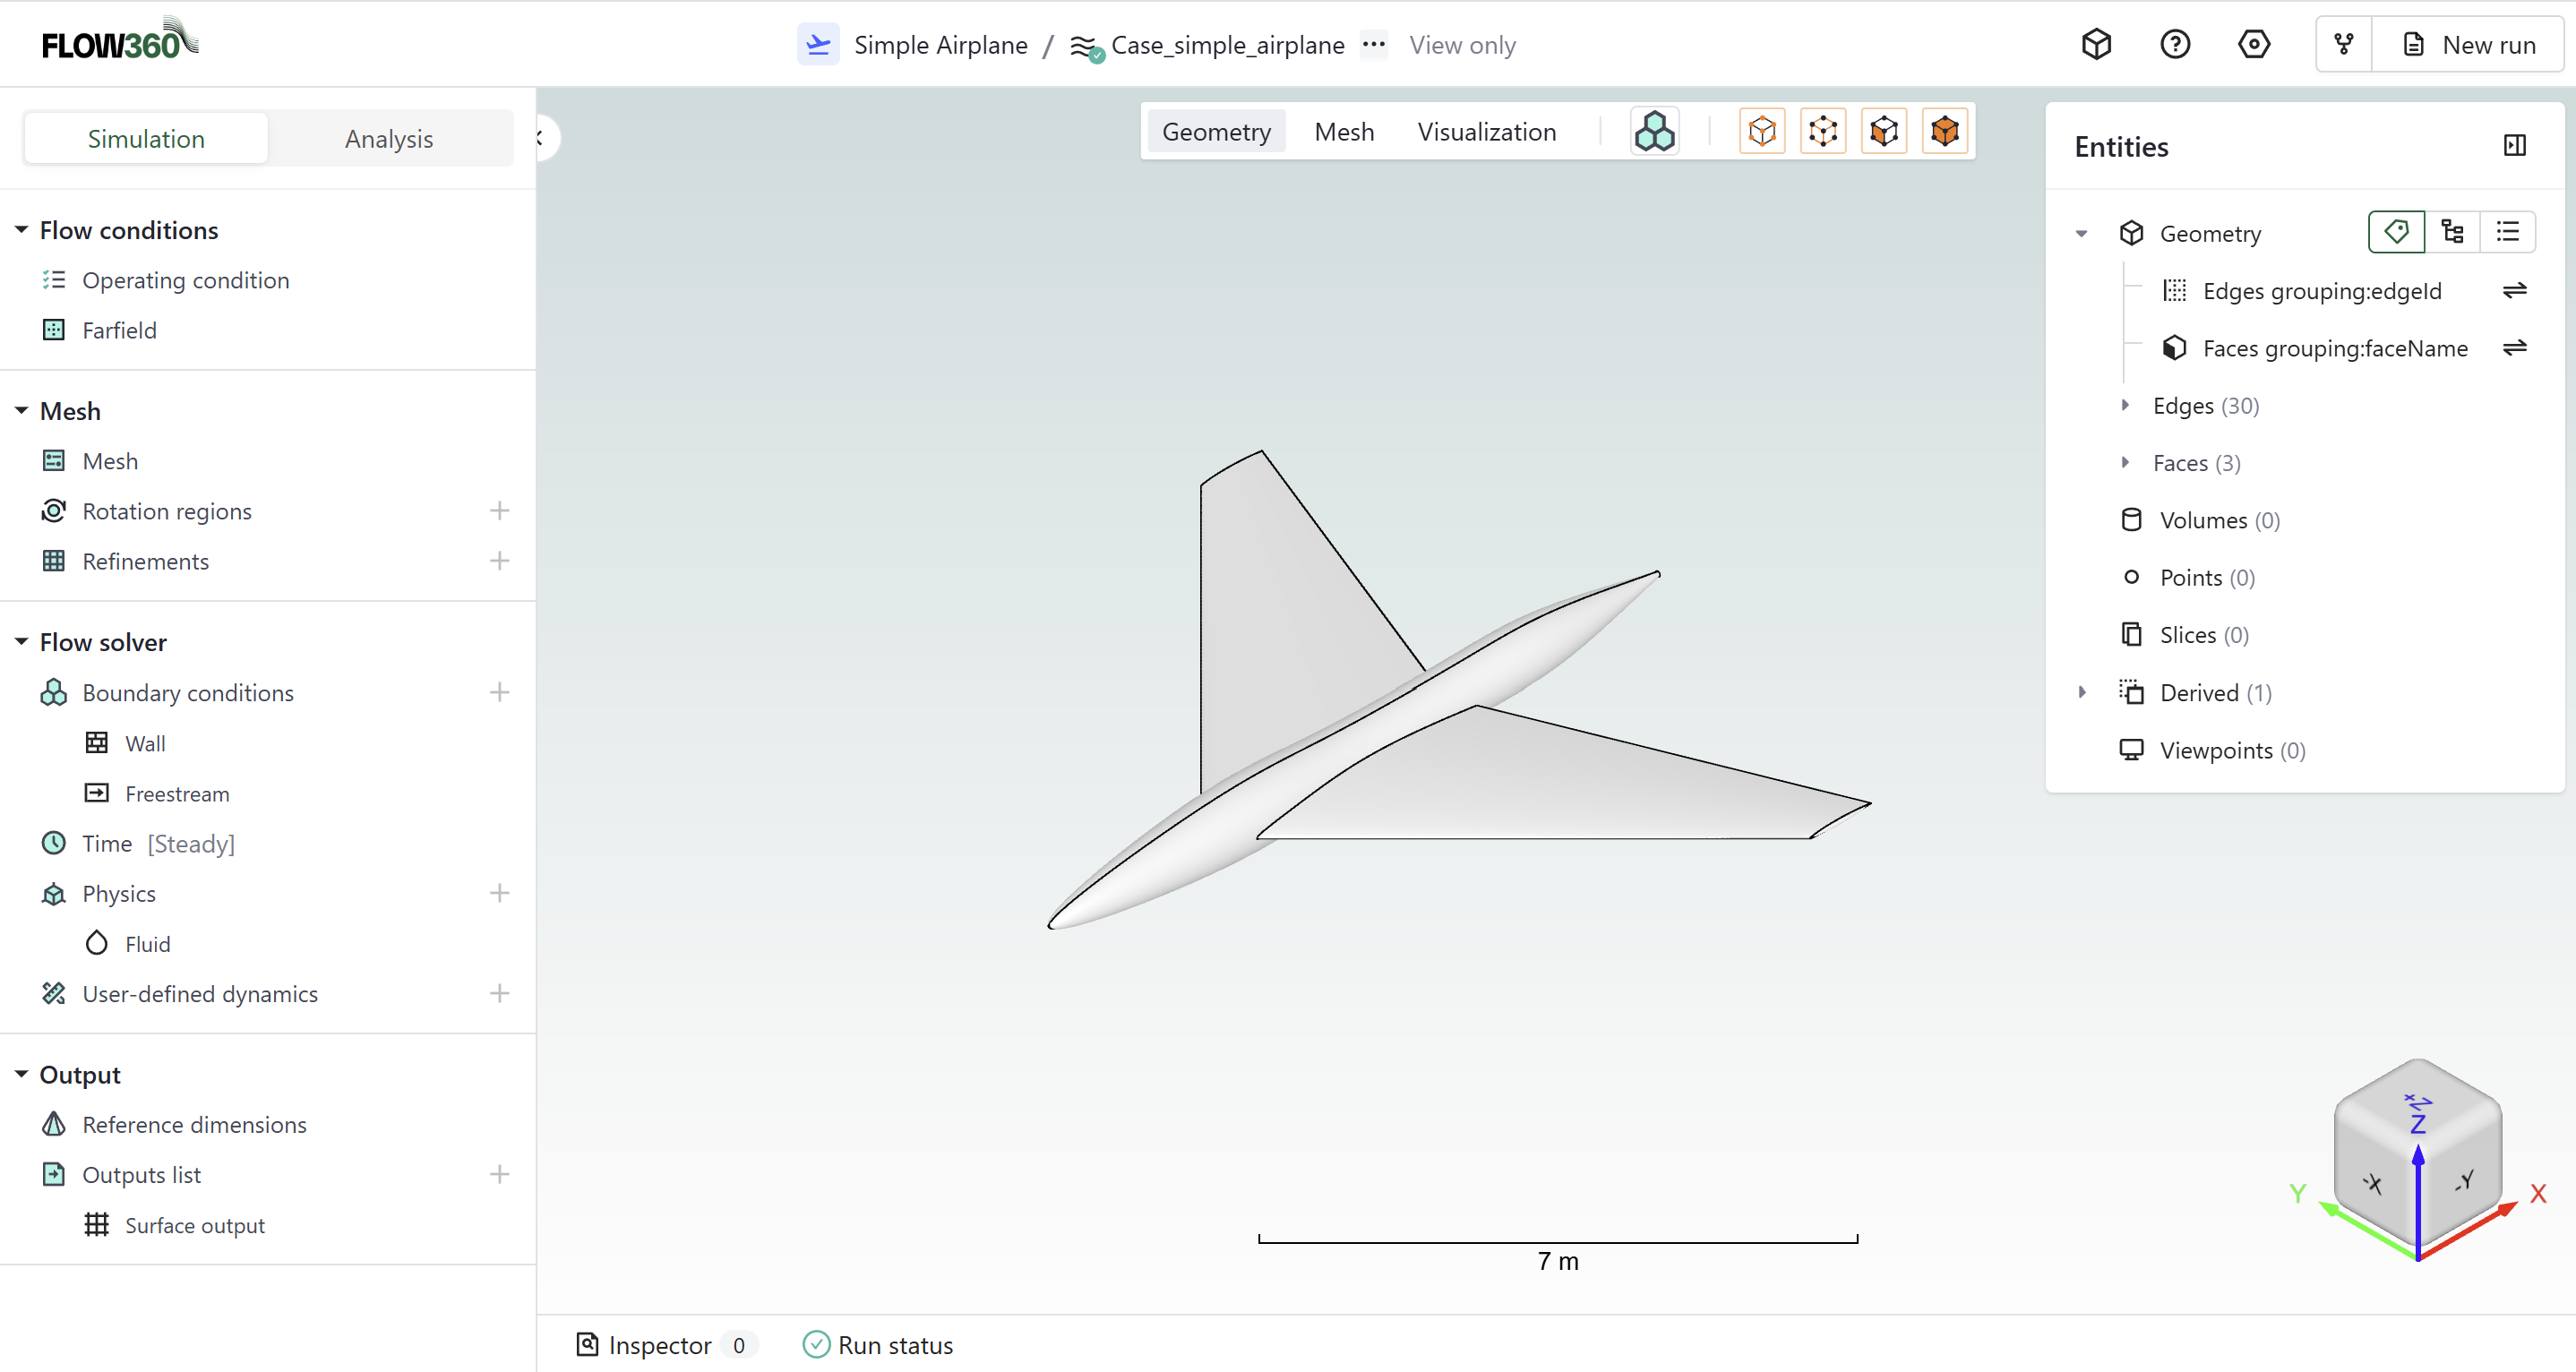
For workbench layout, refer to this page.
Primary Workflow Steps#
Step |
Description |
Location |
|---|---|---|
Setup |
Configure simulation parameters |
Simulation tab |
Verify |
Verify setup using inspector |
Bottom status bar |
Run |
Initiate simulation run |
Top-right corner |
Monitor |
Track simulation progress |
Analysis tab |
Visualize |
View results |
Central viewer region |
Detailed Descriptions#
Setup#
Configure simulation parameters in a top-to-bottom sequence through the left sidebar.
Required Steps:
Meshing configuration (if starting from geometry)
Reference geometry definition
Operating conditions
Models selection
Time stepping parameters
Output settings
Note: Parameters are organized in collapsible sections for clarity
For detailed documentation of each setup panel, see the Simulation Setup guide.
Verify#
Verify simulation setup completeness using the inspector tool.
Location: Bottom status bar
Success Indicator: Inspector showing 0 errors
Note: Address any warnings or errors before proceeding
Run#
Initiate the simulation process including surface and volume meshing.
Location: Top-right corner “Run” button
Scope: Complete workflow from geometry to solution
Note: Automated meshing is included when starting from geometry
Run Preview Dialog#
When you click Run, a Preview dialog appears before the simulation is submitted. This dialog lets you review the simulation configuration and choose how to pay for the compute resources.
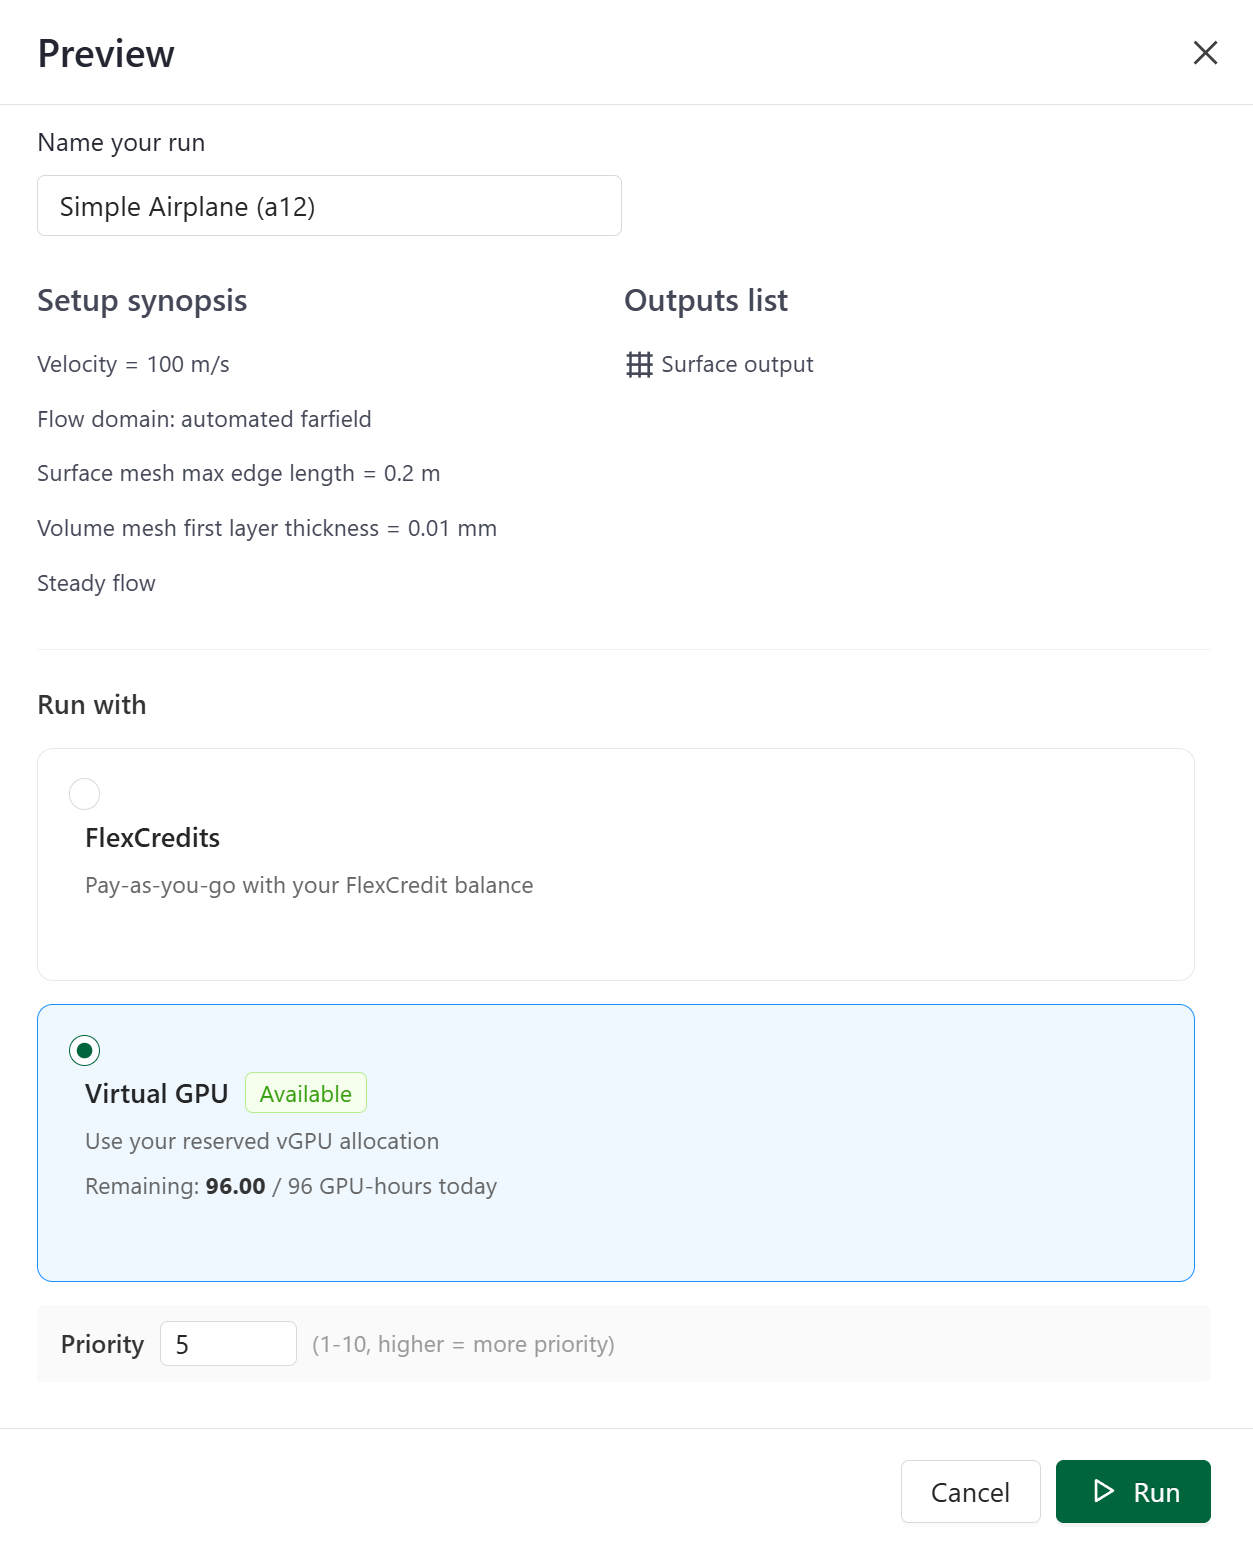
The Run with section offers two compute options:
Option |
Description |
|---|---|
FlexCredits |
Pay-as-you-go using your FlexCredit balance. The run is dispatched immediately to the standard queue. |
Virtual GPU |
Use your reserved vGPU daily allocation. Shows availability status (Available / Unavailable) and the remaining GPU-hours for today (e.g., Remaining: 96.00 / 96 GPU-hours today). |
When Virtual GPU is selected, a Priority field (1–10) appears. Higher priority jobs are scheduled before lower-priority ones when vGPU slots are limited.
Note: The Virtual GPU option is only available if your account includes a vGPU license. If no vGPU allocation is active, only the FlexCredits option is shown.
For full details on managing your vGPU queue, daily allocation, and job priorities, see the Virtual GPU Scheduler page.
Monitor#
Track simulation progress and analyze numerical results.
Access: “Analysis” tab adjacent to “Simulation”
Features: Real-time convergence monitoring
Note: Multiple visualization options available
For detailed documentation of the analysis tools, see the Analysis guide — including Convergence plots and Monitor outputs.
Visualize#
Inspect mesh and results using the central viewer.
Controls: Viewer bar for mode selection
Options: Geometry, mesh, and solution visualization
Note: Interactive 3D viewport with customizable display settings
For detailed documentation of visualization options, see the Visualization page.
💡 Tips
Complete setup sections sequentially from top to bottom
Use the Entities bar on the right for detailed model inspection
Save work periodically during setup
Verify all required fields before execution
Monitor convergence through the Analysis tab
❓ Frequently Asked Questions
What happens if the inspector shows errors?
The simulation cannot be executed until all errors are resolved. Address each error in the setup.
Can I modify parameters during simulation?
Most parameters cannot be modified during active simulation. Stop the simulation to make changes.
How do I track simulation progress?
Use the Analysis tab to monitor convergence and the bottom status bar for overall progress.
Where can I find detailed mesh statistics?
Access mesh details through the Entities browser and mesh visualization options in the central viewer.